Purpose
“Tasks” is where tenants create building access applications. You create one task first, then complete the tickets generated from the task template provided by the building.
Common task types include general, visitor, construction, and garrison. Each type may require different prerequisite data; if the prerequisite data does not exist, the related field may not show the person or visitor you need.
Before you start
- You have joined the target building.
- Your account can create tasks.
- The building has an available task template.
- Visitor type: create the visitor in “My Visitors” first.
- Construction or garrison type: confirm that the building already has qualified contractor personnel.
Relationship between tasks and tickets
In short: the BM configures templates first, and tenants create tasks from those templates. One task can contain multiple tickets; each ticket maps to one form template and approval flow.
Steps
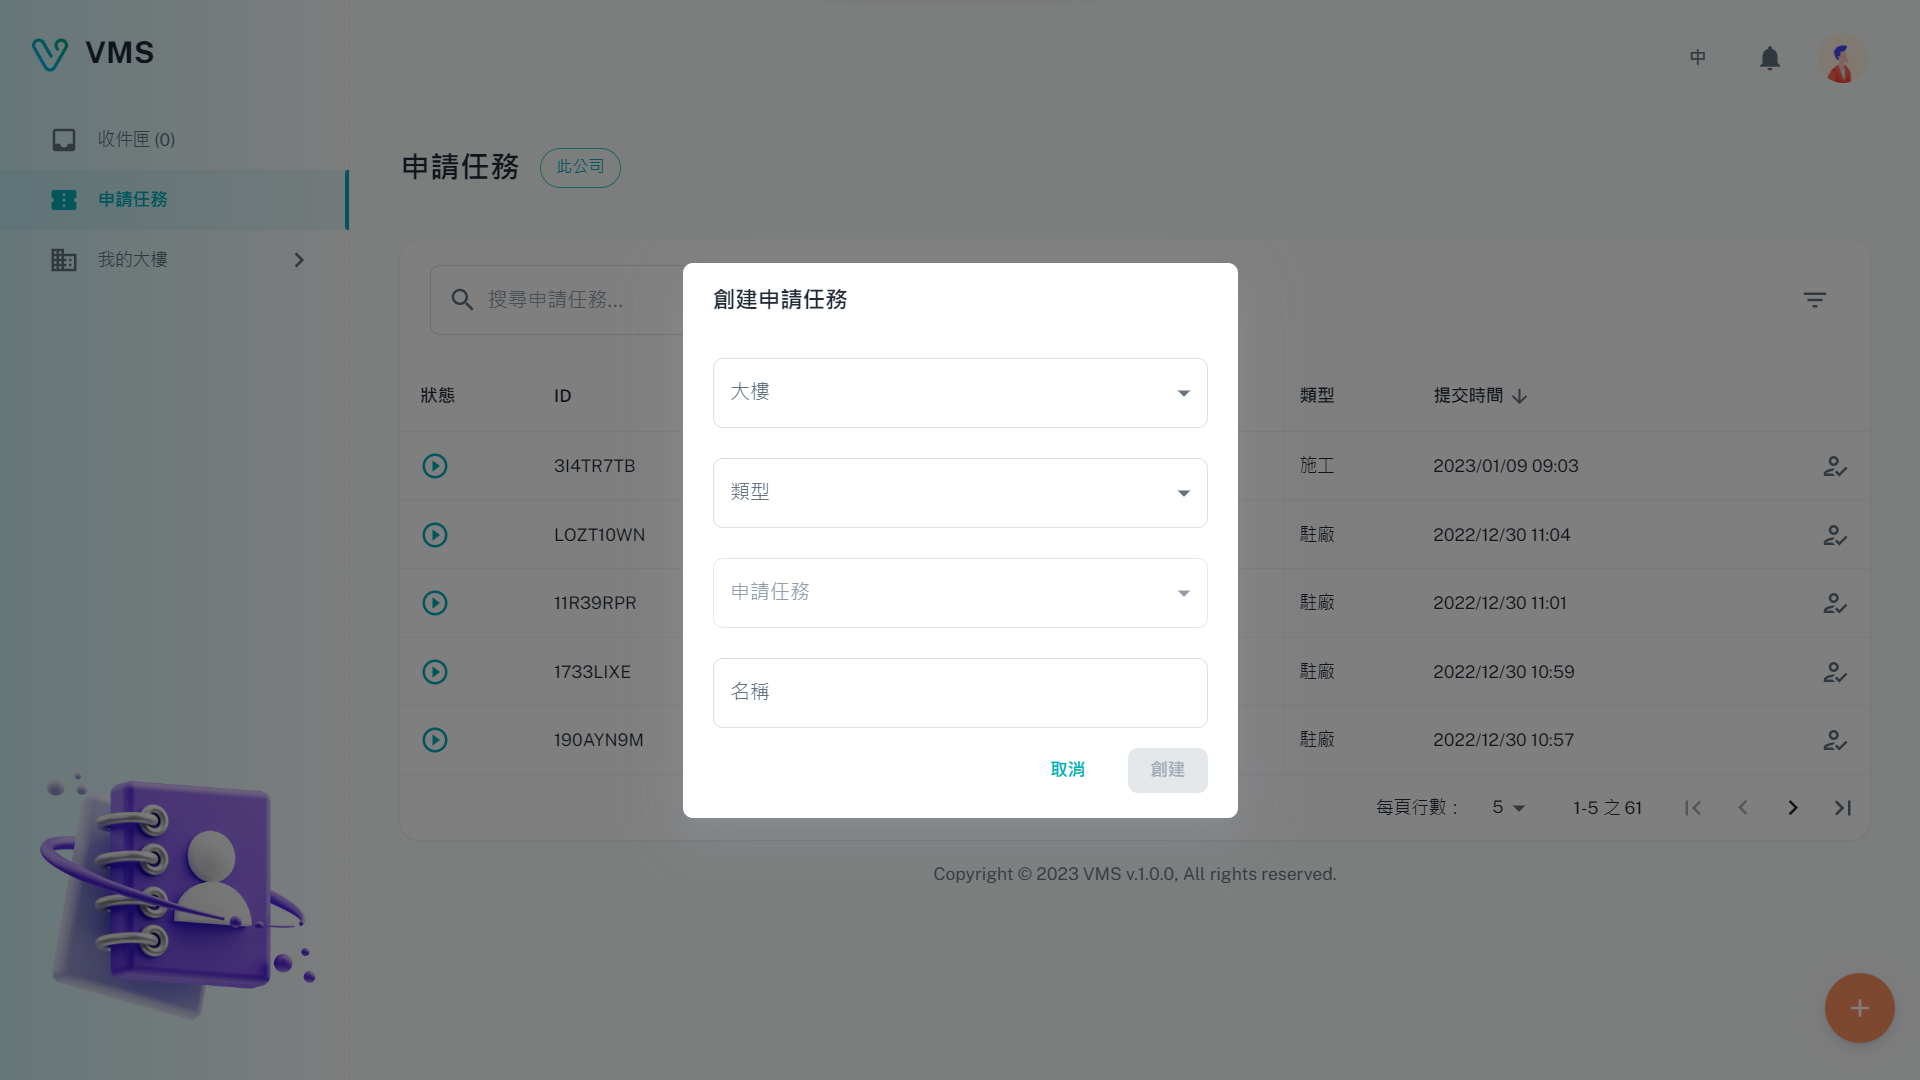
Create a task
- Open “Tasks”.
- Click the “+” button in the lower-right corner.
- Select the building.
- Select the task type: general, visitor, construction, or garrison.
- Select the task template provided by the BM.
- Enter the task name and submit.
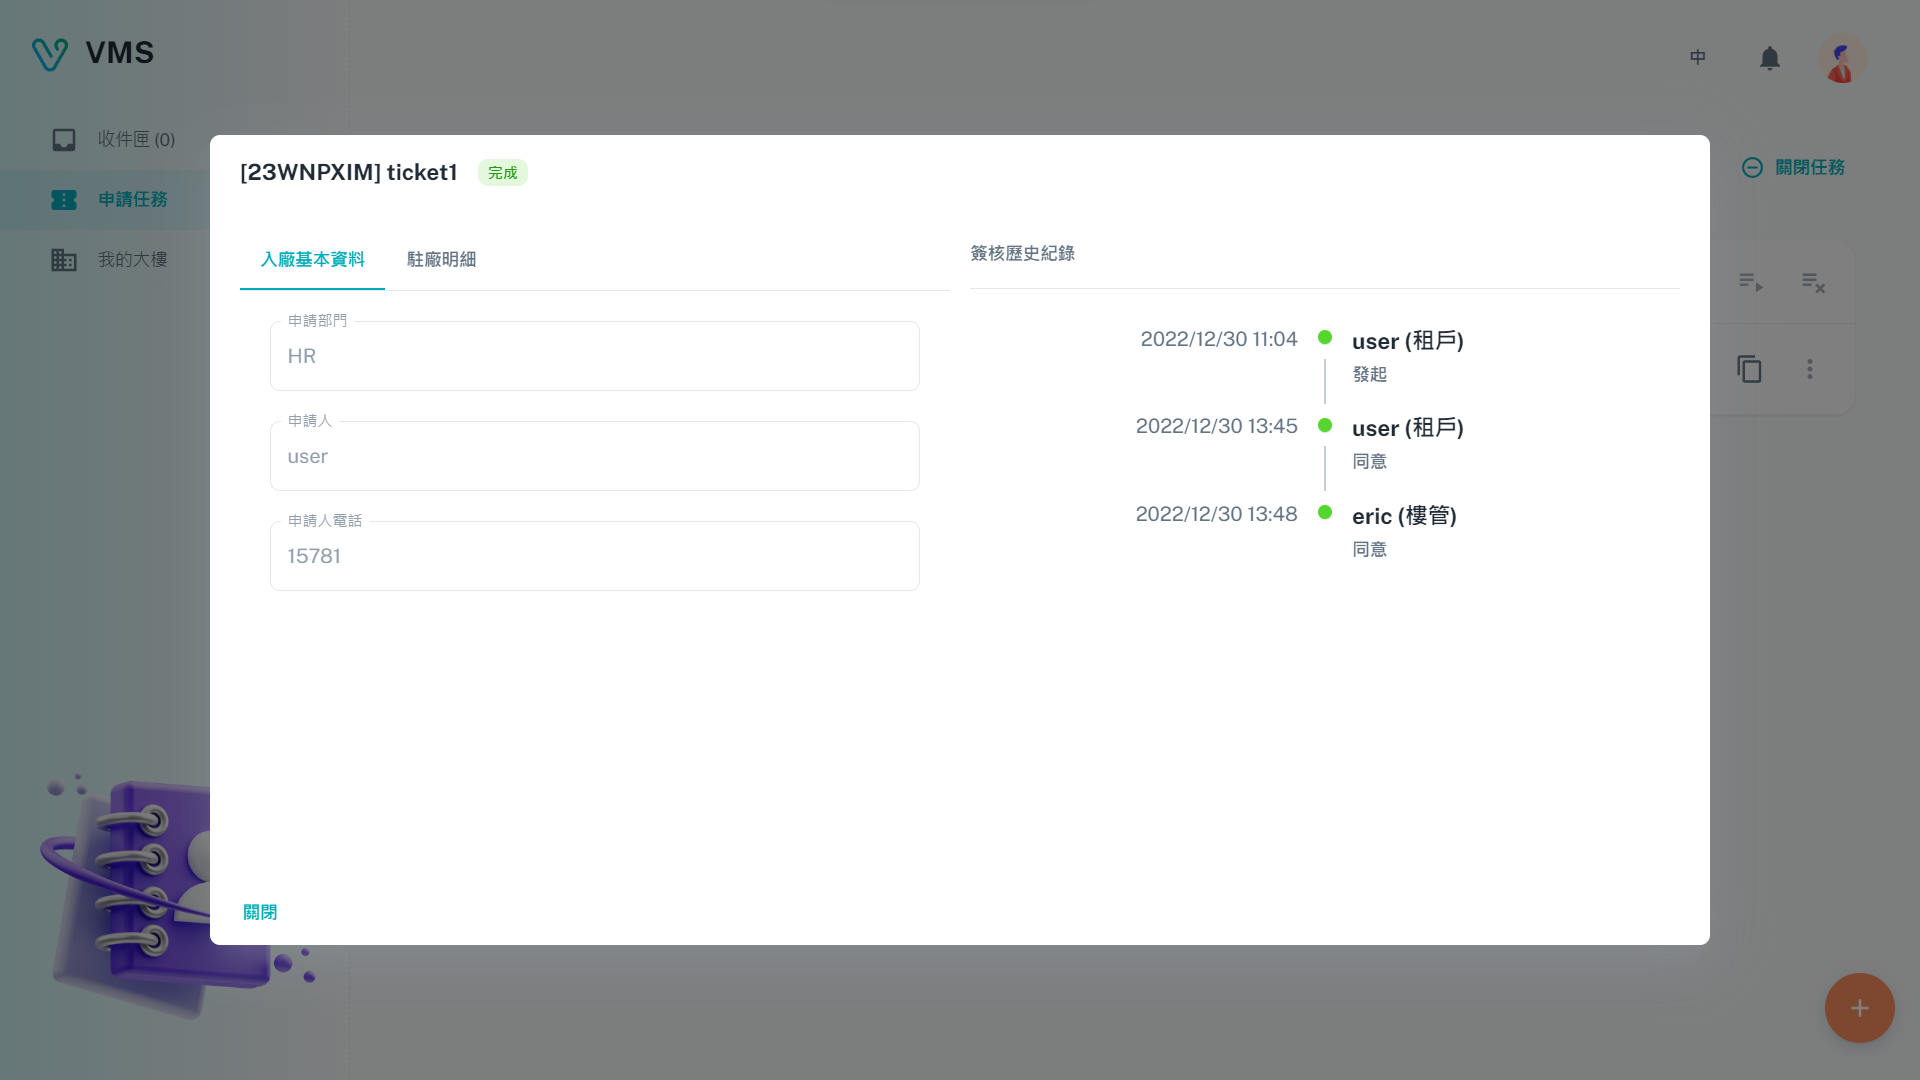
Complete tickets
After the task is created, open the task detail page. The system creates tickets based on the task template; open each ticket and complete the required fields.
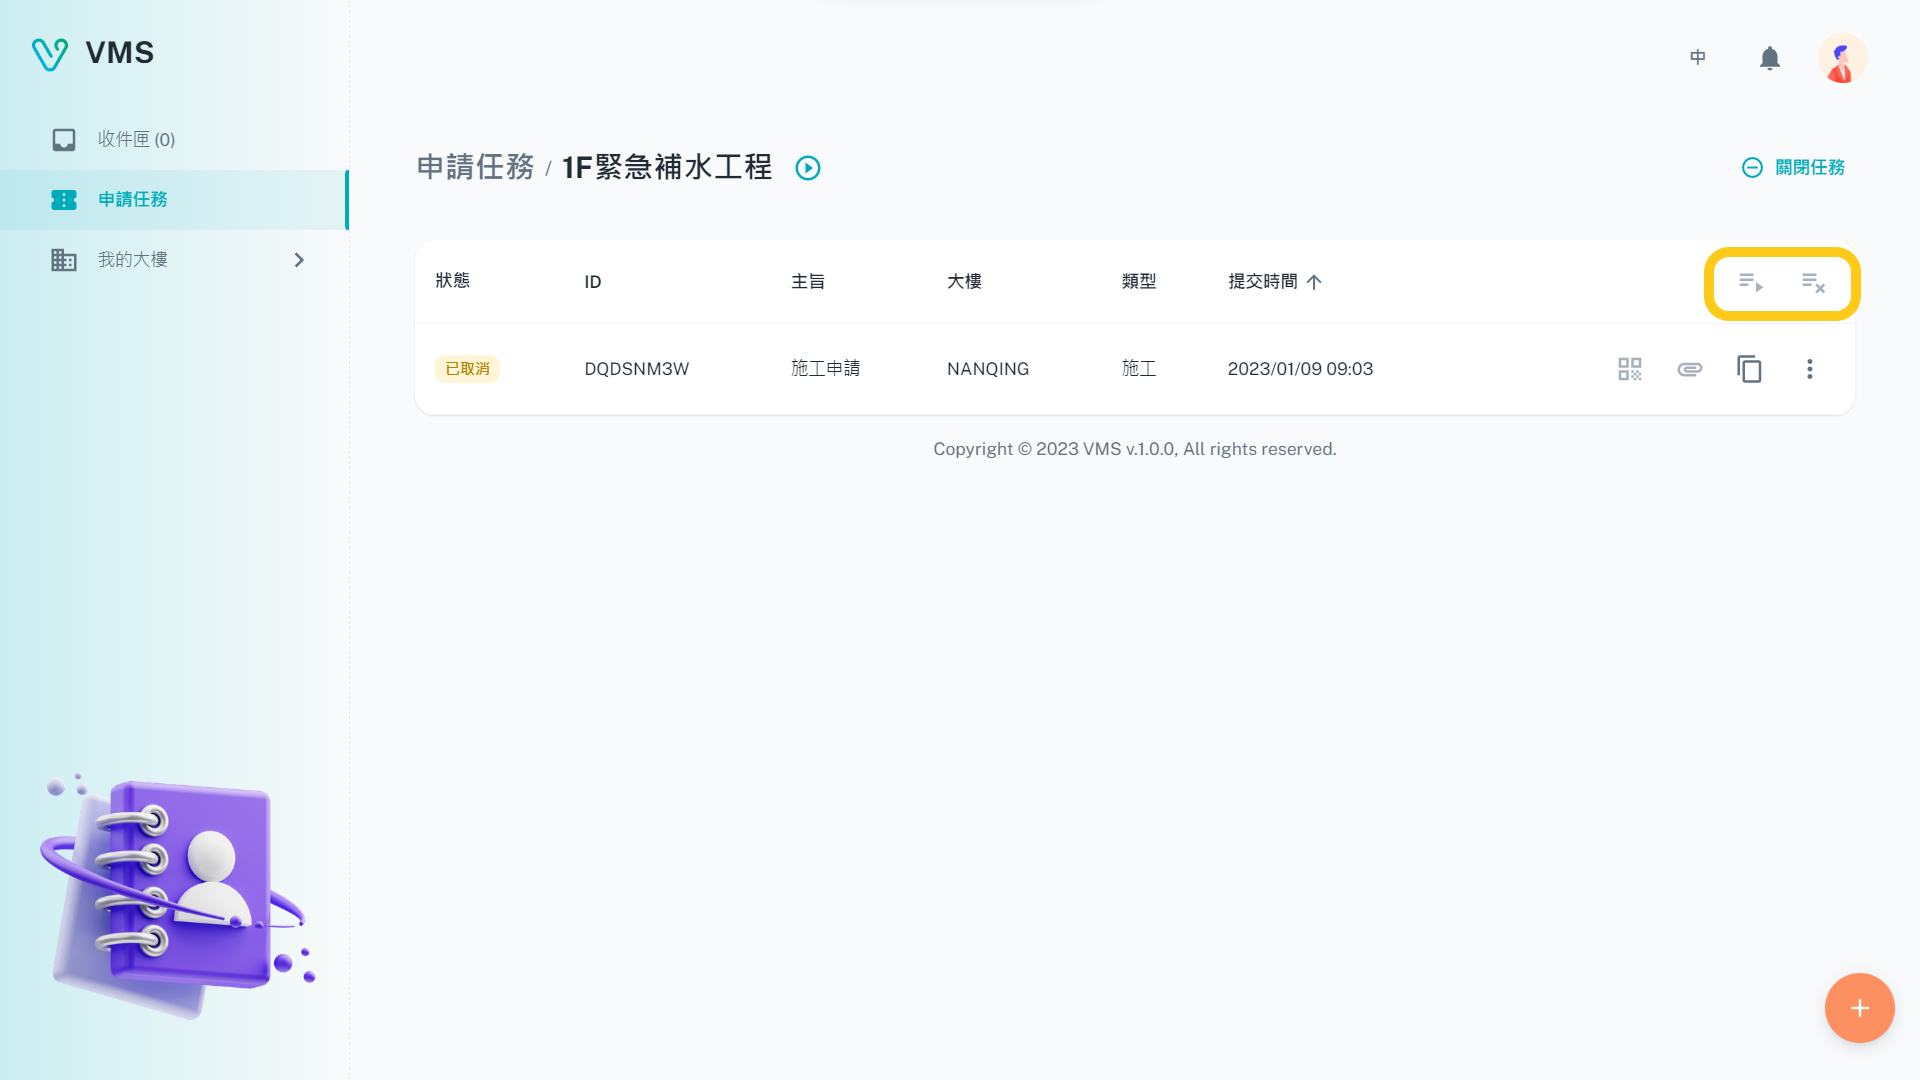
If the current ticket statuses allow it, you can click “+” to add a ticket, or use “Copy” on a ticket row to create a similar ticket.
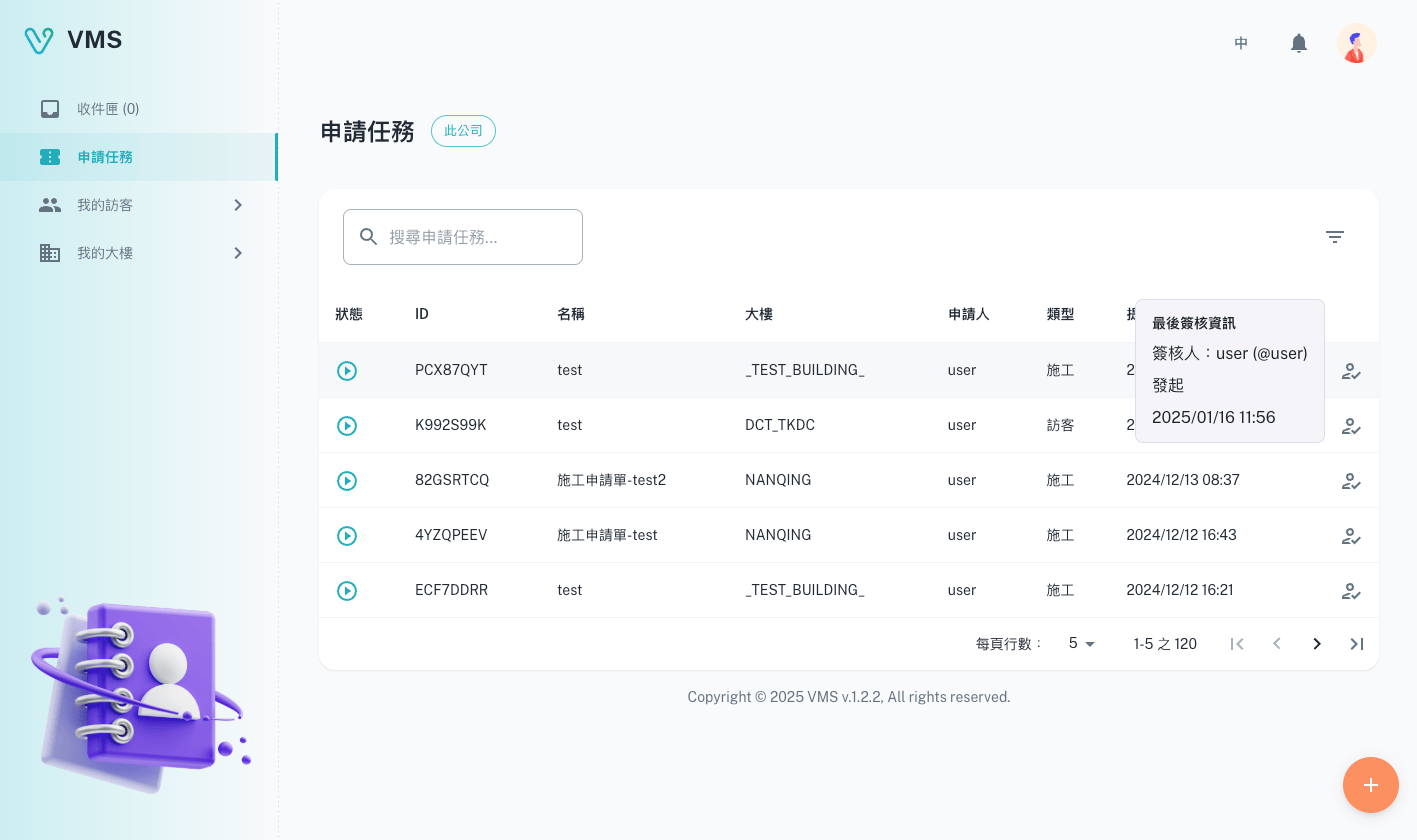
Result
The task appears in the task list. You can search, filter, and sort tasks; scrolling loads more results.
The task detail page lists all related tickets and shows the current approval or processing state for each ticket.
Status reference
Task status
Opened: the default status for a new task.Error: the task has an error. Check the status hint and contact an admin.Locked: an admin has locked the task; it cannot be edited or closed.Closed: the task is closed and cannot receive new tickets. Closed tasks cannot be reopened.
Ticket status
Standby: the ticket content is not complete yet.Standby Ready: the ticket has been created and can continue.Error: the ticket has an error. Check the hint or contact an admin.Running: the ticket is in processing or approval.Declined: the ticket was declined.Cancelled: the ticket was cancelled.Done: the ticket flow is complete.
In the current product behavior, QR Code is shown only in specific task contexts and can be used only after ticket closure.
FAQ
- Visitor cannot be found: create the visitor in “My Visitors”, then return to the ticket.
- Construction or garrison personnel cannot be found: ask the BM to create contractor personnel in the building and confirm they are “qualified”.
- Task template cannot be found: ask the BM to confirm that the building has an available task template.
- Cannot add a ticket: check whether existing ticket statuses allow adding, or ask the BM whether the task is locked or closed.