Form Templates
You need a construction form that asks for the work type, requests extra information when needed, and goes to the right approvers. Configure those rules in Template Management > Form Templates.
Before you start
Use a BM administrator account with verified email and confirm the building and application type. If you can only view content, ask an administrator to check permissions. Forms that select construction or garrison personnel need qualified personnel in the same building.
Scenario 1: make a new form from an existing template
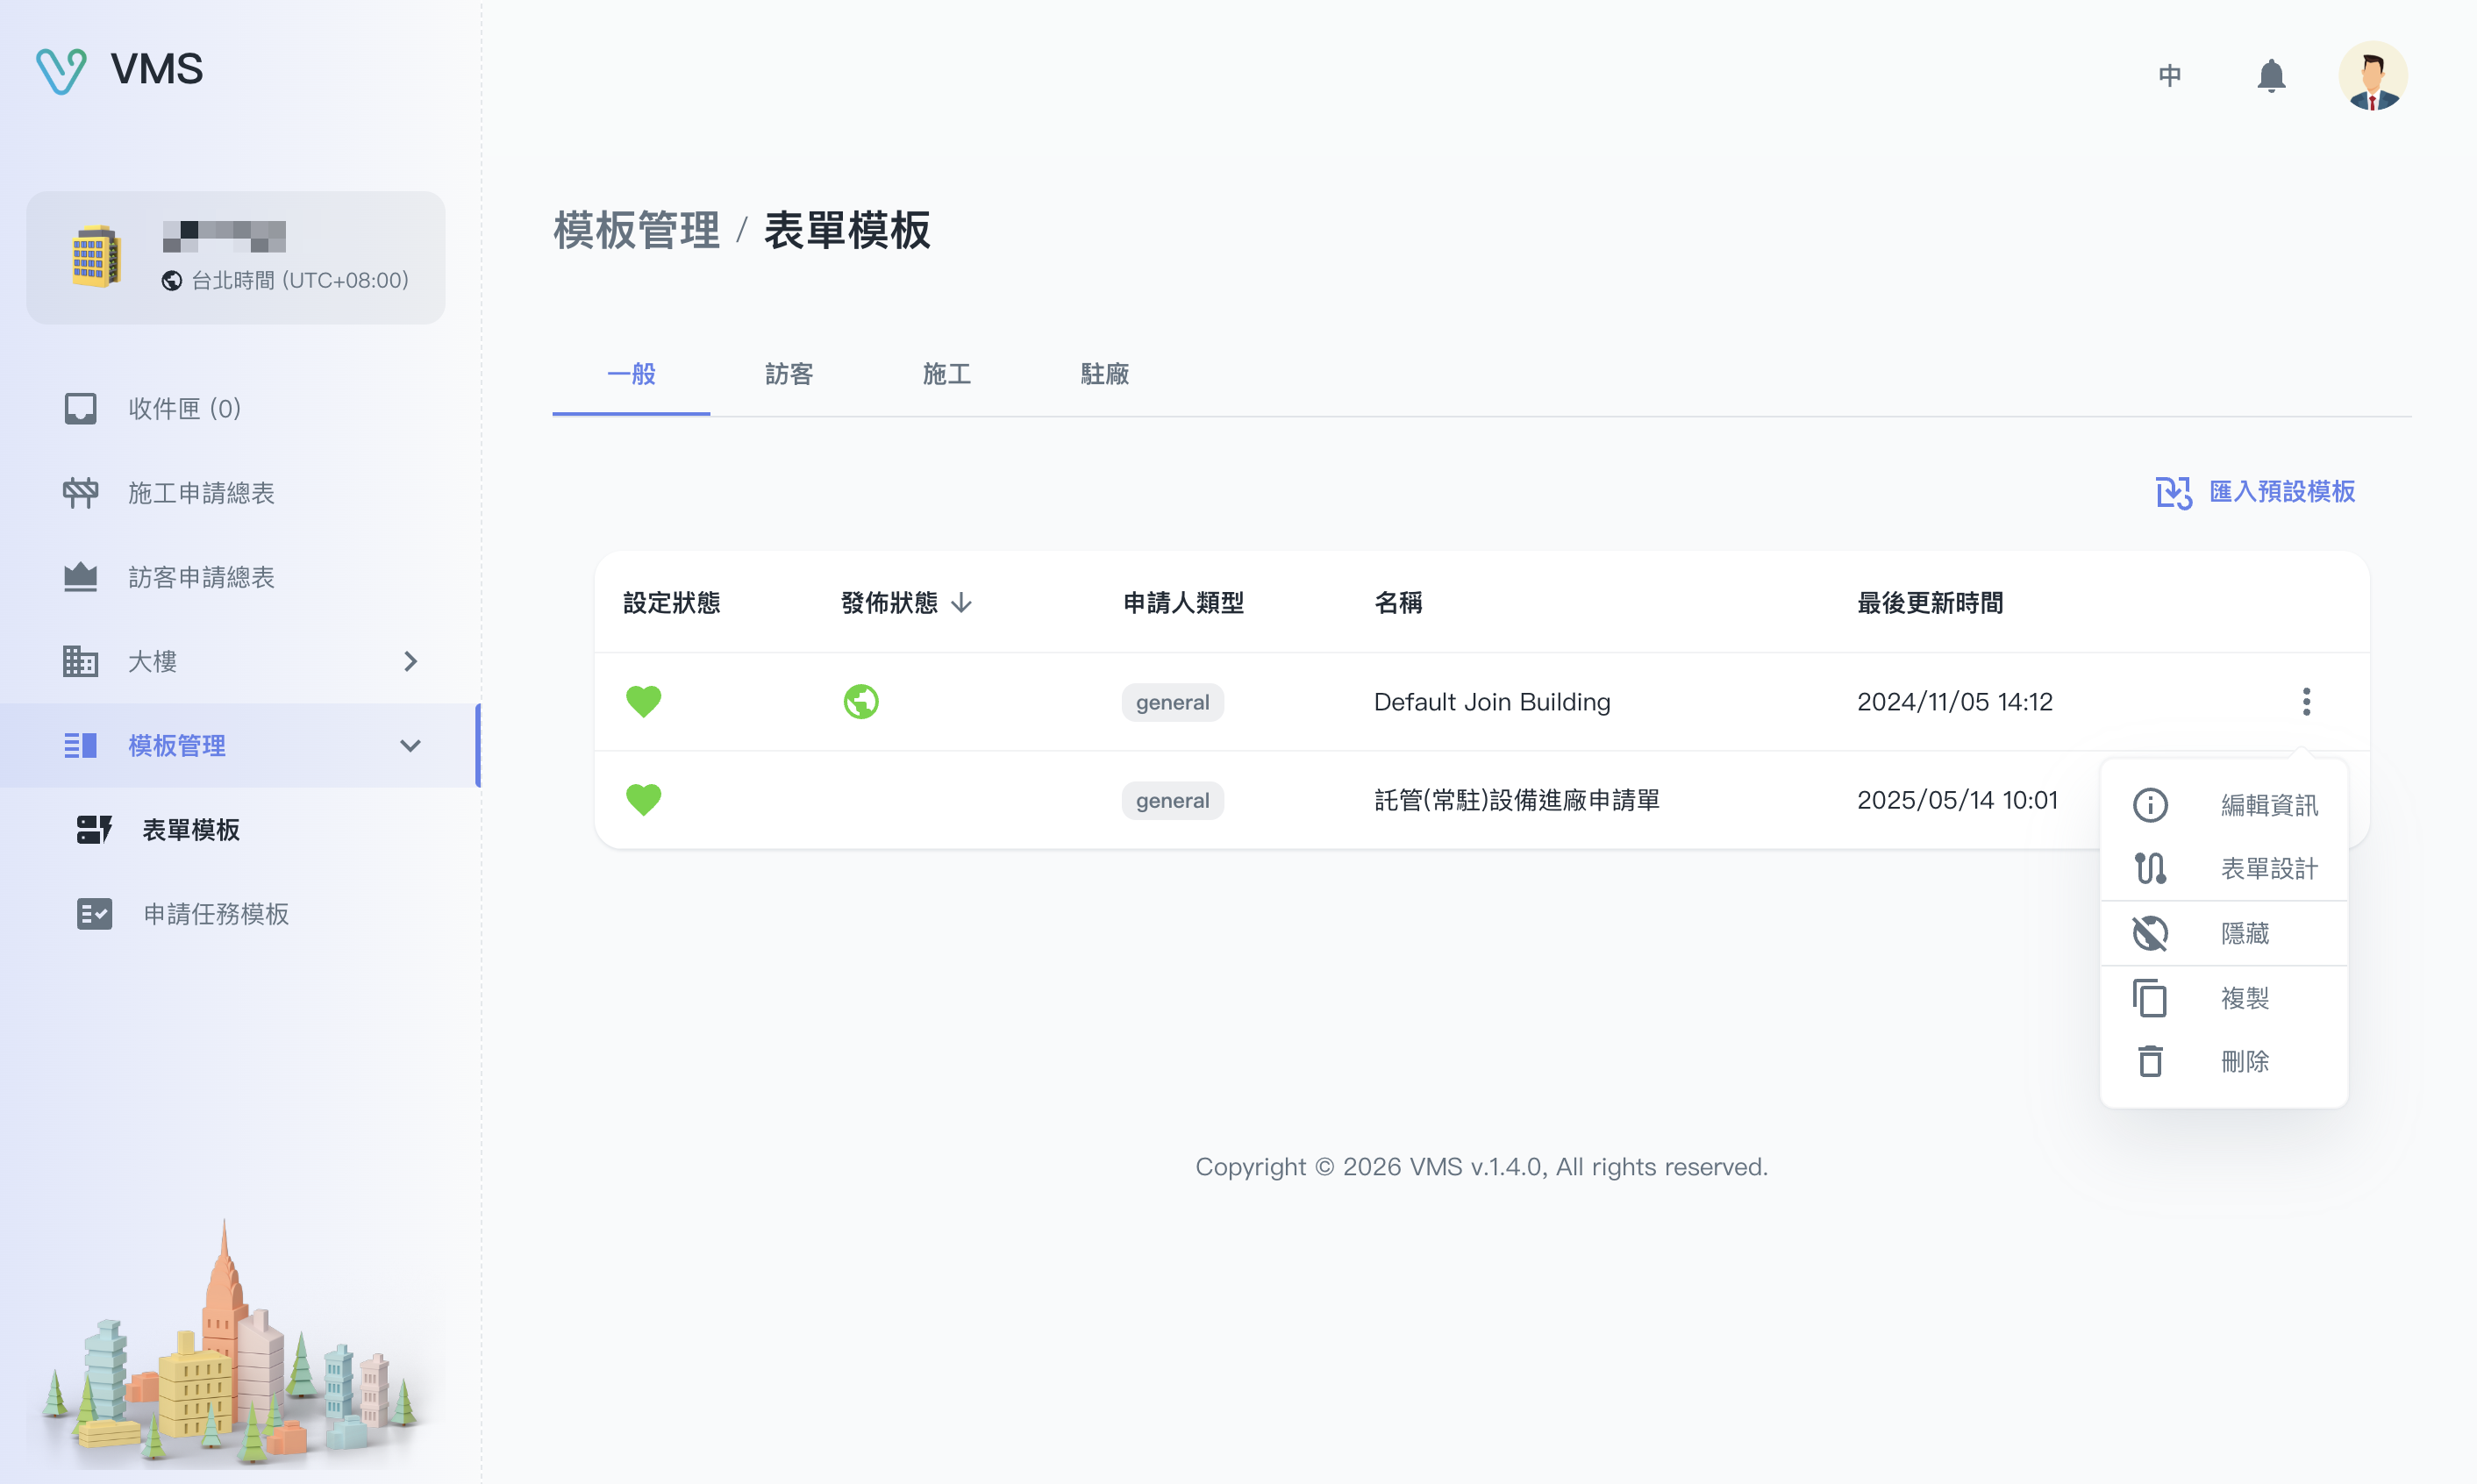
Choose a suitable form template, then open its available menu to design or copy the form.
This earlier screenshot illustrates the feature. The current layout and button labels may differ.
- Open Form Templates and select the general, visitor, construction, or garrison type.
- Use Import Default Template to preview and import a provided form, or choose More > Copy on an existing form.
- Confirm the source and new name, submit, and find the new form in the list.
- Open More > Edit Info when needed. Check the name, applicant type, initiator, and closing role; observe any read-only fields.
- Choose More > Form Designer to configure the content.
The designer has General, Form Schema, Approval Management, and Attachment management tabs. Save changes in each tab before leaving it. If you switch tabs or close with unsaved changes, the page asks whether to discard them. Cancel navigation and save to keep your work.
Scenario 2: make the form clear and complete
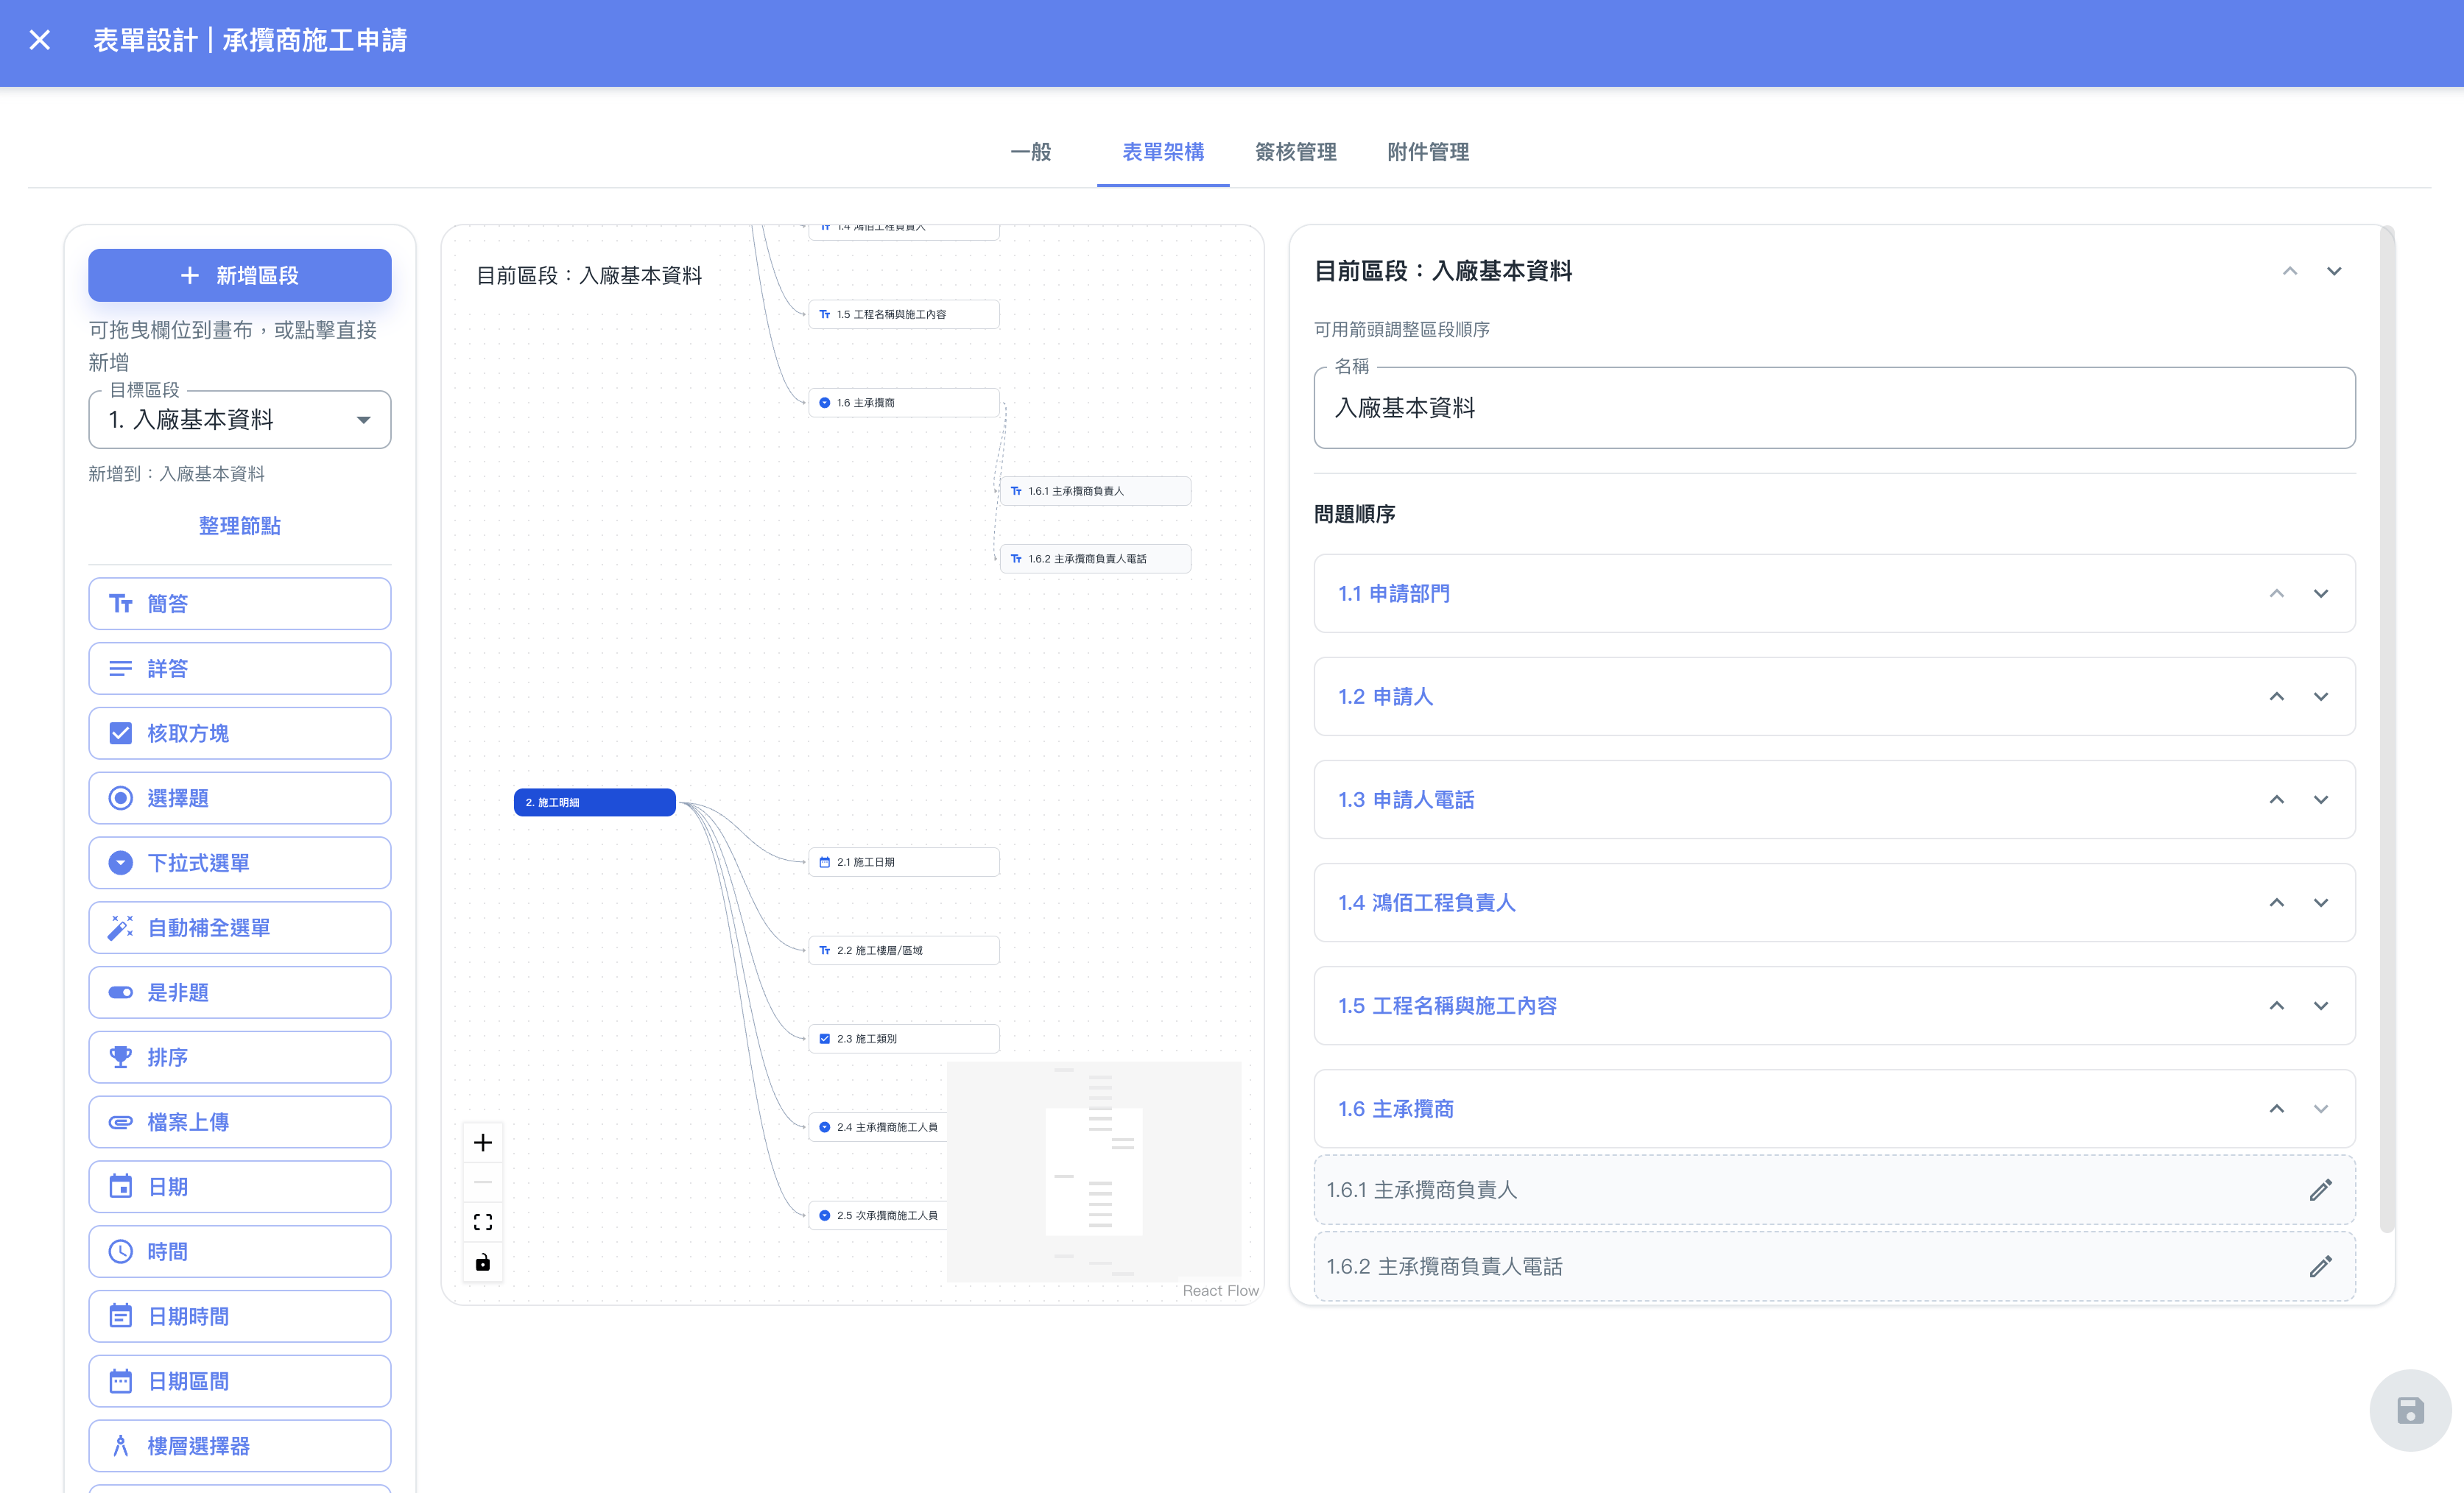
Use the form designer to arrange questions and sections. Conditional questions and newer field types are described in the steps below.
This earlier screenshot illustrates the feature. The current layout and button labels may differ.
- In Form Schema, add or select a section and give it a recognizable name.
- Click a question type or drag it onto the canvas, then select its node to edit.
- Enter the question and required properties. Question labels support multiple lines; variable names must be present and unique.
- Choose the field type for its purpose and configure required answers, choices, or upload restrictions.
- Return to the section’s Question order list and drag a handle to reorder questions. Bound controls move with their question. With the keyboard, use Space to pick up, arrow keys to move, Space to drop, and Esc to cancel.
- Save the schema and resolve any validation errors.
| What the question needs | Suitable fields |
|---|---|
| Names, contact details, or explanations | Short or long text; phone fields validate the configured country format |
| Work types or yes/no decisions | Checkboxes, radio choices, select, autocomplete, or boolean |
| Order choices by priority | Ranking |
| Visitors, floors, or tenant contacts | Visitor Selector, Floor Selector, Tenant User Selector |
| Supporting documents | File upload with allowed types, count, and size |
| Work dates and times | Date, time, date-time, or Date Range |
| Instructions without an answer | Note |
Add a reminder without asking for an answer
Add Note and enter Note content, such as safety guidance. It appears directly in the form, requires no answer, and has no required-answer setting. Notes support line breaks, ordering, and display conditions, but cannot serve as the source of another condition.
Limit how many days an application can cover
For Date Range styles that allow multiple days, Maximum days accepts a whole number from 1 to 365. Leave it empty to omit this limit. The start date is day 1: a three-day limit starting September 22 allows an end date no later than September 24. Applicants must correct an excessive range before completing the form.
Scenario 3: ask a follow-up question only for specific work
This example uses a question you create called “Does this involve special work?” It is not a fixed field in every building.
- Create the source question first, such as the boolean question above.
- Add a later question or section and select the item that should depend on the answer.
- Turn on Enable conditional display and choose a Source field. The source must appear earlier; a whole-section condition can only use questions in earlier sections.
- Choose the Operator and Comparison value, such as “equals” and “True”. Multiple-choice sources use “contains” or “does not contain”; “is empty” and “is not empty” check whether an answer exists.
- Use Add rule for additional conditions, then choose Match all rules or Match any rule.
- Select Done to check the summary, then save the entire form schema.
Result: the follow-up field or section appears when answers match. Bound controls can also have conditions. Newly authored conditions clear answers when hidden by default; changing an answer may require the applicant to fill the dependent content again.
Deleting a source question or option, or moving a source after its target, can invalidate a condition. Correct the source and comparison value before saving. Ranking and Note are unavailable as new condition sources.
Scenario 4: send the form to the right approvers
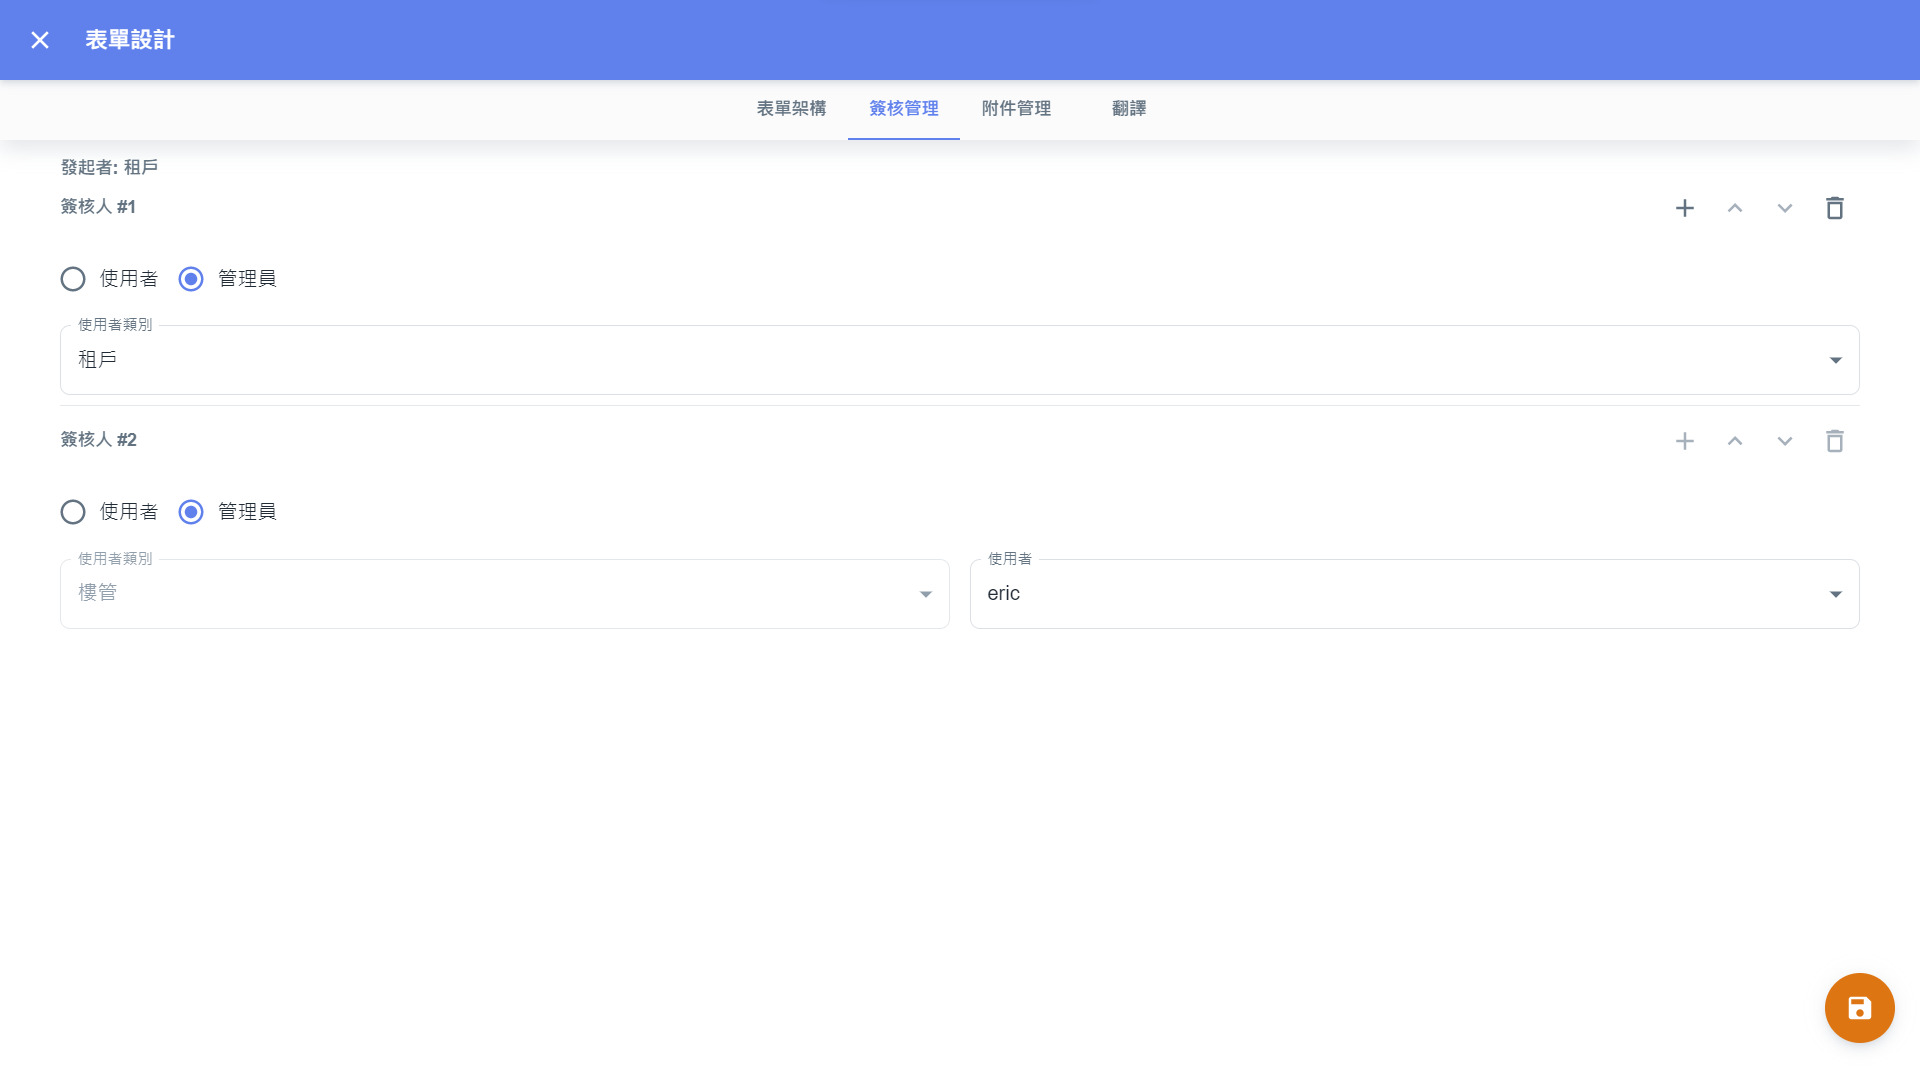
Check the intended approvers and the order in which the application will be handled.
This earlier screenshot illustrates the feature. The current layout and button labels may differ.
- In Approval Management, check the role and approvers for each stage.
- Applicants choose approvers for stages that require tenant selection; select BM users for building-manager stages as provided by the editor.
- Configure available countersign, delegate, or additional-approver options as needed.
- For pre-approval fields or approval-completion actions, check source fields and expected data types. Resolve reported issues first.
- Save, then use Attachment management to upload documents that tenants should download after approval. Confirm the upload result.
A Note provides form instructions; it is separate from a suggestion entered by an approver. Approvers record their reasons while handling the application.
Make the form available to tenants
Check configuration status in the list. Incomplete configuration prevents publishing; resolve its reported issues first, then choose Publish from More. Bind the form in a Task Template to provide a complete application entry point.
Use Conceal when the form should no longer be offered. To delete it, confirm it is no longer needed and complete More > Delete.
When something goes wrong
| What you see | What to do next |
|---|---|
| Saving fails | Check question labels, variable names, options, date limits, and condition sources in the reported errors. |
| No earlier source fields | Place the source before the target; section conditions need questions from earlier sections. |
| A tenant cannot see the form | Check the building, type, release state, task binding, and unmet conditions. |
| Contractor personnel are missing | Check their building and qualification. |
| An attachment download fails | Read the error, check the connection and browser download settings, and retry. |